
Photographing Stained Glass Without Glare, Reflections, or Hotspots
Glare, hotspots, and reflections ruin most stained glass photographs. Here is how to beat them with camera position, flags, polarizers, exposure, and careful editing.
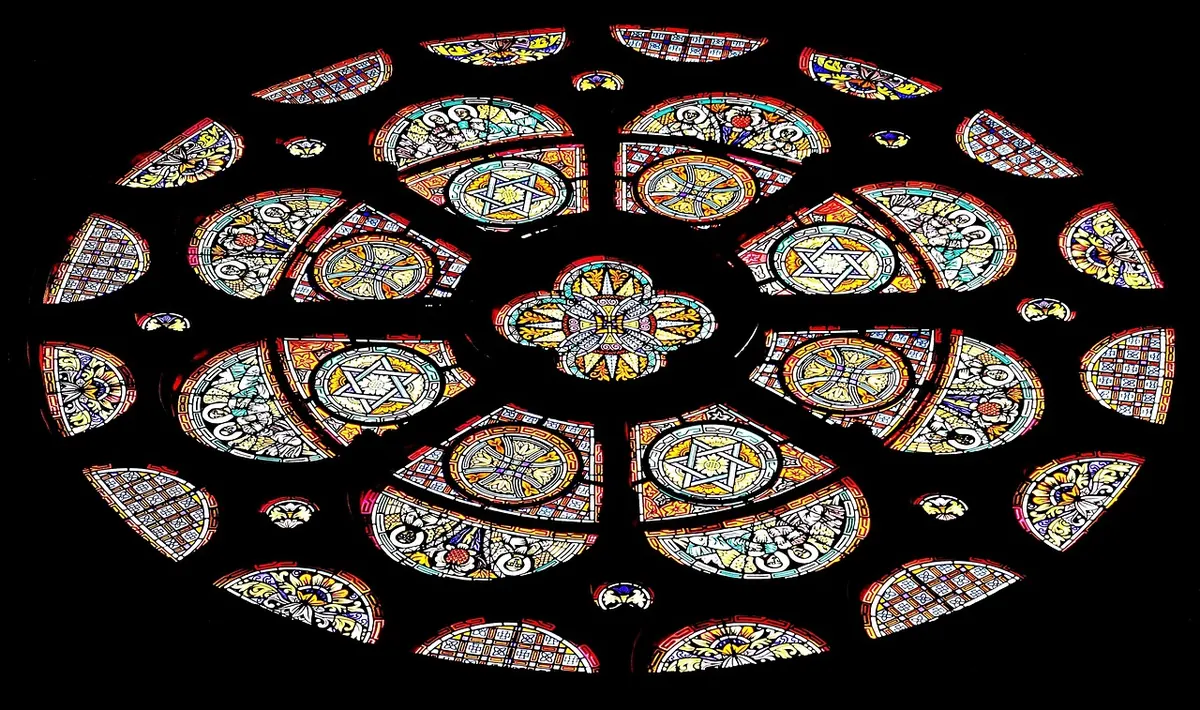
Stained glass makes its own light and then does its best to wreck the photograph of it. You are shooting a transparent subject through a reflective surface. Nearly every failed panel shot falls into the same three buckets: a mirror-bright rectangle where a face should be, a blown-out hotspot sitting on a blue robe, or the reflection of a museum ceiling in the glass case that is supposed to protect the work. All three are geometry problems, not mysteries. Your feet, a piece of black cloth, a polarizer used at the right angle, and two or three differently exposed frames will solve most of them.
Start With the Light, Not the Camera
Before the tripod comes out, walk the space and answer one question: what is the glass doing with light? A church window in daylight is a source — you are photographing transmitted light. A panel inside a case is a subject lit from the outside, and the front pane of that case is a mirror aimed straight at your lens.
Find every bright thing at roughly the height of the panel: a lamp, a lit doorway, a whitewashed wall, a fire exit sign, a vestibule window, someone in a pale coat. Everything on that list will turn up somewhere in your frame as a reflection. Once you know where the trouble comes from, you can decide whether to return at a different hour, ask staff about switching off a light, or simply work from another side.
Time of day matters more than gear. Direct sun through a panel blows out the pale glass — golds, whites, soft yellows — while leaving deep blues muddy. An overcast day, or a window in shade with the interior lights off, usually gives the most even transmission. If a beam of sun is crawling across the panel, wait. Ten minutes often changes everything.
Watch for mixed light, too. A panel lit by daylight on one side and a warm interior bulb on the other will show a color shift across the glass. If the window faces north in the northern hemisphere, it rarely receives direct sun, which makes it a strong candidate for even, saturated color. South-facing windows can be wonderful early and late in the day, but by noon the contrast is often beyond what any sensor can hold.
Move Your Feet, Then Flag the Light
A reflection is not painted onto the glass. It is an image of a light source, and where it lands depends on where you stand.
The angle of reflection equals the angle of incidence — which means a hotspot travels about twice as far as you do, in the opposite direction.
If the bright blob sits on a saint's face, step a meter to the left. It slides right and may land in a dark border where nobody will notice. Step back and it shrinks. This is the cheapest fix in stained glass photography.
You can also interrupt the beam. A reflection has a path: source to glass, glass to lens. Block either leg and it disappears. A matte black cloth, a sheet of foam board sprayed flat black, or a folded dark jacket held just outside the frame, close to the glass, on the light's side, will kill a stubborn hotspot. Keep the flag out of the artwork's own light path — you want to stop the beam heading for the front surface, not shadow the panel itself.
The same logic applies to you. Wear black or dark grey. Remove the lanyard and the watch, and turn the phone screen down. If you are shooting a case, a black cloth over your shoulders works as a portable darkroom. Keep the lens hood on, use a rubber hood pressed flat against the glass where it is allowed, and never rest weight on an antique case or a leaded panel. Ask first; museum and parish staff are generous with people who ask politely and then stay out of the way.
Pay attention to floors and polished stone. A bright marble floor can throw a soft glare upward into the lower panels, especially when you are standing close. A dark jacket laid on the floor just outside the frame, or a shooting position that keeps the camera lower or higher than the polished surface, can remove it. In tight chapels, a friend holding a black umbrella behind you can black out a whole wall of reflections.
What a Polarizer Will and Won't Do
A circular polarizer does one job well: it suppresses glare bouncing off non-metallic surfaces, glass included, at an angle. Rotate it slowly while watching through the viewfinder. You will see the hotspot dim and the colors in the panel deepen as the surface sheen disappears.
It does not do everything. At dead-on angles there is very little for a polarizer to grab; the reflection is coming straight back, and no filter setting will erase it. That is a job for position or a flag. Also, a polarizer costs you one to two stops of light, which matters when you are trying to keep a dim interior from going noisy. Use it when it visibly helps, and take it off when it does not. A polarizer can also deepen a blue sky seen through the glass, but that sky is part of the picture, so decide whether you want it richer or more neutral.
If you are using a phone, a clip-on polarizer works, but rotate it while watching the screen. The same rule applies: the hotspot will dim at the right angle and disappear at the wrong one.
Exposure: Protect the Highlights, Recover the Shadows
Stained glass is a high-contrast subject. The bright panes clip to white long before the dark lead lines and shadowed borders reveal detail. If you expose for the shadows, you lose the highlights. If you expose for the highlights, the shadows go black. The answer is usually to expose for the brightest area you care about and then make a second or third frame for the darker areas.
- Expose for the highlights: Check the histogram and let the brightest panes sit just below the clipping point. A little under is better than blown.
- Bracket: Shoot three frames at two-stop intervals. Later, you can blend them or choose the best one.
- Shoot raw: Raw files hold much more recoverable detail in the deep blues and reds than JPEGs.
- Use a tripod: Bracketing and long exposures require a steady camera. If tripods are not allowed, brace yourself, use a timer, and lean into a wall or pew.
Do not ignore white balance. Daylight through glass can be cool, while interior lights are warm. If you are blending frames, set the same white balance for all of them. A gray card is ideal, but a neutral area of stone or a white sheet of paper in the same light can get you close.
Shooting Through Cases and Glass Shields
A display case adds a second sheet of glass between you and the artwork. The front pane reflects whatever is behind you, including your face, your tripod, and the room's ceiling lights. The good news is that the geometry rules still apply.
- Turn off or shield any light behind you if staff allow it.
- Wear black and cover shiny gear.
- Get the lens as close to the glass as possible, ideally with a rubber hood touching it.
- Angle slightly off-axis if the case allows, so your reflection misses the lens.
- Use a polarizer if the case glass is not laminated or tempered in a way that creates rainbow patterns.
- Ask about opening the case or turning off interior lights, especially in small museums and parish churches.
Never press hard on historic glass, and never move an object to improve a shot. If the reflection cannot be beaten, consider photographing from the side, photographing a detail through a clean part of the case, or coming back when the room is darker.
A Simple Field Workflow
- Walk the room. Identify every light source and reflective surface.
- Choose your angle. Move left, right, up, and down until the hotspot lands on lead or dark glass.
- Flag the beam. Use black cloth or board to block the path from source to glass.
- Polarize if it helps. Rotate slowly and watch the surface sheen change.
- Expose for highlights. Bracket and shoot raw.
- Check focus and level. Stained glass is often photographed straight-on; a tiny tilt is distracting.
None of this requires exotic equipment. It requires patience, a dark cloth, and a willingness to move your feet before you touch a dial. Do that, and the glass will finally look the way it looked to you in the room: luminous, saturated, and free of the photographer's ghost.
Photo: NoName_13 / Pixabay